You’re out by the pool, sun’s hitting just right, and then you see it. A steady, rhythmic drip-drip-drip coming from the bottom of that big beige tank. It’s the sand filter drain cap. Honestly, it’s a tiny part, probably the smallest piece of equipment in your entire filtration system, but when it fails, it feels like the whole backyard is underwater. Most people panic. They think the tank is cracked. They start googling the cost of a new Hayward or Pentair filter, which, let's be real, is enough to ruin your weekend. But usually? It’s just this little plastic cap or the rubber ring inside it.
It’s annoying. I get it.
The drain cap serves one primary purpose: it’s the gateway for winterizing your pool or swapping out old, gunked-up sand. When you’re ready to close the pool, you unscrew it, and the water evacuates the tank so the internal pipes don’t crack when the ground freezes. But because it sits there under constant pressure for 365 days a year, it takes a beating. Chemicals, UV rays, and the sheer force of the pump eventually turn that flexible plastic into something brittle and prone to snapping.
The Anatomy of the Sand Filter Drain Cap (And Why It Fails)
If you look at a standard sand filter drain cap, it’s not just a lid. Most modern setups, like those from Hayward (especially the ProSeries) or Pentair’s Sand Dollar line, use a two-part system. You’ve got the outer cap and an internal gasket or O-ring. Sometimes, there’s even a "sand screen" or lateral assembly sitting right behind it to keep the sand in while letting the water out.
Why do they leak? Usually, it’s the O-ring.
Rubber hates chemicals. Over time, the chlorine or bromine in your pool water leaches the plasticizers out of the rubber. The O-ring goes from being squishy and sealing everything tight to being flat, cracked, and useless. If you’ve ever tried to tighten a leaking cap and it just kept leaking—or worse, it cracked under the pressure of your wrench—you’ve experienced "over-torque." It's a common mistake. People think tighter is better. In the world of pool plumbing, tighter usually just means "expensive snap sound."
Sometimes the threads on the tank itself get cross-threaded. This is the nightmare scenario. If the male threads on the filter body are stripped because someone tried to force a sand filter drain cap on at an angle, you aren’t just looking at a $10 cap anymore. You might be looking at a specialized patch job or a new tank.
Identifying Your Specific Model
You can't just walk into a hardware store and grab a generic cap. Pool brands are notoriously picky about threading. A Hayward SPX1960D is not the same as a Pentair 154492. One might be a fine thread; the other might be a buttress thread.
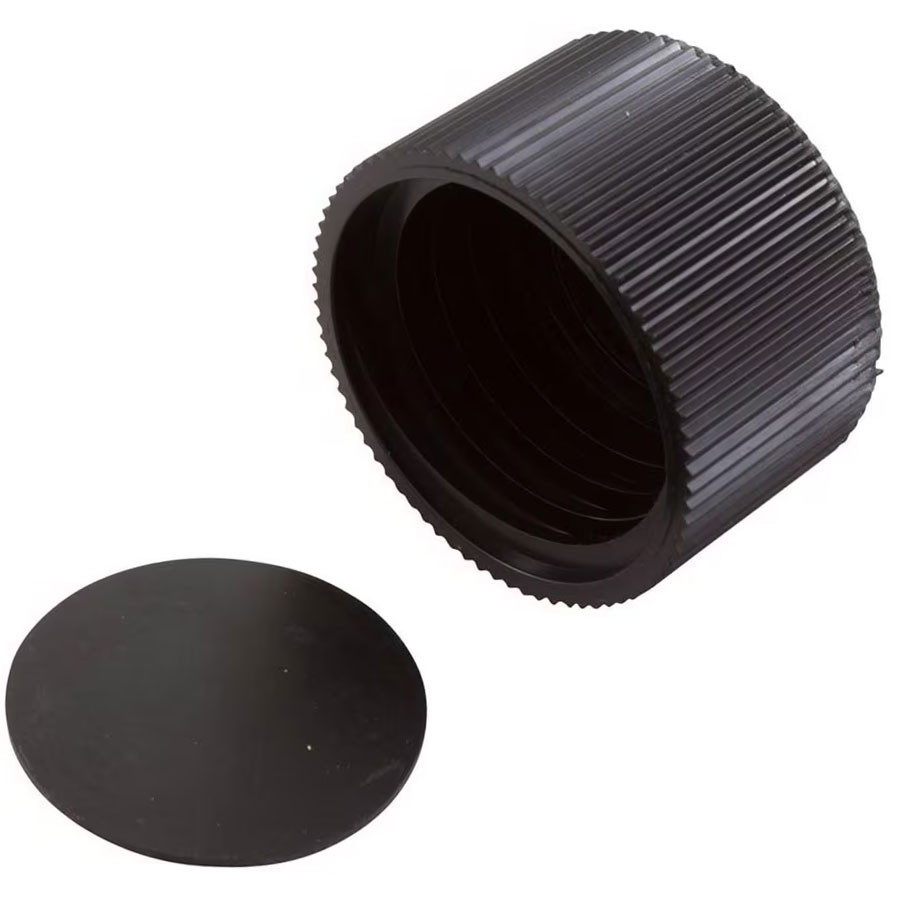
If you have a Hayward S166T, for instance, you’re looking for a specific drain plug with an O-ring. If you have an older Jacuzzi or Sta-Rite, the part might look completely different, more like a large, flat disc. Always check the label on your filter tank first. It’s usually a big weather-worn sticker. Look for the "Model No." or "Serial No." before you buy anything. If the sticker is gone? Measure the diameter of the opening with a digital caliper. It's the only way to be sure.
When to Replace the Cap vs. Just the O-Ring
Stop. Don't throw away the cap yet.
If the plastic looks solid—no visible hairline fractures or whitening (which indicates stress)—you probably just need a new O-ring. This costs about three dollars. You can find these at any local pool supply shop. The trick is to bring the old one with you.
However, if you see "crazing"—those tiny little spiderweb lines in the plastic—the cap is toast. It’s been weakened by the sun. If you leave it, it will eventually blow off under pressure, and you’ll wake up to a half-empty pool and a very burnt-out pump motor. Pump motors need water to stay cool; if the drain cap pops and the water level drops below the skimmer, the pump starts sucking air, gets hot, and dies.
A $15 sand filter drain cap can save you a $600 motor. It’s basic math, really.
The Lubrication Secret
Nobody talks about this, but you absolutely have to use the right lube. Never, ever use Vaseline or any petroleum-based product on your pool gaskets. Petroleum eats rubber. It’ll swell the O-ring until it doesn't fit, and then it'll degrade it into a gooey mess.
You need silicone-based or Teflon-based lubricant. Magic Lube is the industry standard. Jack’s Multilube is another good one. Apply a thin film to the O-ring before you screw the cap back on. This does two things: it creates a better hydraulic seal and it prevents the rubber from "binding" and bunching up as you tighten the cap.
Troubleshooting a Persistent Leak
So you bought the new sand filter drain cap, you lubed the O-ring, you hand-tightened it, and it’s still dripping. What gives?
- Debris in the threads: Even a single grain of pool sand in the threads can prevent a perfect seal. Use an old toothbrush and some clean water to scrub the threads on the tank.
- The "Invisible" Crack: Sometimes the leak isn't the cap. It’s the flange where the drain pipe meets the filter body. If the tank was moved roughly, that joint can develop a hairline crack. Dry the area completely with a towel and use a flashlight to watch exactly where the first bead of water forms.
- Cross-Threading: If the cap feels "stiff" after only half a turn, back it out. It should spin on smoothly until the very end.
- The Gasket Shift: Sometimes, as you tighten the cap, the O-ring squirts out of its groove. This is why we lube. If it's not seated in the "seat," it won't seal.
If you’ve checked all of these and it’s still leaking, check the internal air relief. Some filters have a small breather tube inside that can get clogged, causing weird pressure fluctuations at the bottom of the tank. It’s rare, but it happens.
Replacing the Sand Filter Drain Cap: A Step-by-Step Reality Check
This isn't a complex job, but if you do it while the pump is running, you're going to get a face full of water and sand.
Step 1: Turn off the power. Don't just flip the switch on the timer; hit the breaker. You don't want the pump kicking on while you've got the drain open.
Step 2: Relieve the pressure. Turn the handle on your multiport valve to "Closed" or "Winterize," and open the air relief valve on top of the tank (usually near the pressure gauge). You'll hear a hiss. That’s the pressure leaving. If you don't do this, the vacuum might make it impossible to unscrew the cap, or the pressure will launch it across the yard once the threads let go.
Step 3: The Bucket Method. Unless you want a wet feet, put a shallow bucket under the drain. Even with the pump off, there are several gallons of water held in the "freeboard" area of the sand.
Step 4: Clean and Inspect. Once the old sand filter drain cap is off, look inside the hole. Do you see a little plastic mesh? That’s the sand screen. If it’s broken, sand will leak out with the water. If it's missing, you need to replace that too, or you'll be constantly losing your filter media.
Step 5: Install. Lube the O-ring. Hand-tighten the cap. Do not use a pipe wrench. If you absolutely feel like it needs more than hand-tight, use a pair of channel locks but only give it another 1/8th of a turn.
Step 6: Test. Turn the multiport valve back to "Filter," close the air relief on top, and flip the breaker. Watch the cap. If it’s dry, you’re golden.
Common Misconceptions About Filter Drains
I hear this all the time: "Can I just use PVC cement and glue a permanent cap on there?"
No. Please, no.
You will eventually need to change your sand. Sand lasts about 3-5 years before the edges of the grains wear down (becoming "round") and stop catching debris. When that time comes, you need that drain to wash out the old silica. If you’ve glued it shut, you’re going to be hunched over the top of the tank with a shop vac for six hours, questioning every life choice that led you to this moment.
Another one is the "Teflon Tape" myth. People think wrapping the threads in white plumber's tape will fix a leaking sand filter drain cap. On these specific plastic fittings, Teflon tape can actually act as a lubricant that allows you to over-tighten the cap too easily, which leads to—you guessed it—cracking the tank or the cap. The seal should come from the O-ring, not the threads. If the threads are doing the sealing, something is wrong.
Real-World Examples: Hayward vs. Pentair vs. Intex
If you own an Intex or one of those "Easy Set" above-ground pools, your drain cap is likely a very flimsy, thin plastic. These are notorious for stripping. Because the tanks are thinner, the heat expansion during July and August can actually warp the drain port. In these cases, sometimes a specialized "over-cap" is needed.
On the high end, like a Pentair Triton II, the drain is a much more robust assembly. It often includes a "piping" setup that sticks out from the tank. If this leaks, you're often replacing a 1/4 inch NPT plug rather than a large cap. It's a different beast entirely. Knowing which one you have determines whether your fix costs five dollars or fifty.
Why Winterization Matters for the Cap
If you live in a climate where it freezes, the sand filter drain cap is your best friend. Ice expands with incredible force. If water is trapped in the bottom of that tank, it will split the fiberglass or plastic shell wide open.
When you winterize, take the cap off and put it in the pump basket for the winter. Don't leave it on the ground; it'll get lost or stepped on. Putting it in the pump basket ensures you know exactly where it is come May. Also, check the O-ring then. If it's cracked in October, buy the replacement then so you aren't scrambling when the pool stores are packed during the spring opening rush.
Summary of Actionable Steps
- Check the Model: Identify your filter brand and model number from the tank sticker before ordering a replacement.
- Inspect the O-ring: Look for flattening, cracks, or "gummy" textures. Replace if any are present.
- Clean the Threads: Use a brush to remove sand and grit from both the cap and the tank's male threads.
- Use Proper Lube: Apply a silicone-based lubricant (never petroleum jelly) to the rubber gasket.
- Hand-Tighten Only: Avoid heavy tools that can crack the plastic or strip the threads.
- Verify the Sand Screen: Ensure the internal mesh is intact so you aren't losing sand while the cap is off.
- Dry and Observe: Use a dry cloth to wipe the area after installation to confirm the leak has actually stopped.
- Store Properly: During winter, keep the cap and its O-ring in a safe, dry place like the pump strainer basket.