Ice is just frozen water. Simple, right? But when your fridge starts making those pathetic, shriveled-up slivers or, even worse, stops dropping cubes entirely, the culprit is almost always a small, plastic-and-metal component tucked away at the back of the machine. The ice maker water valve.
It’s an unassuming part. Honestly, most homeowners don't even know it exists until their kitchen floor is wet or the glass under the dispenser stays empty. This little solenoid-operated gatekeeper is the only thing standing between your home’s pressurized plumbing and the delicate plastic tray inside your freezer. If it sticks open, you’ve got a flood. If it clogs, you’ve got a desert.
Why the Ice Maker Water Valve Fails When You Least Expect It
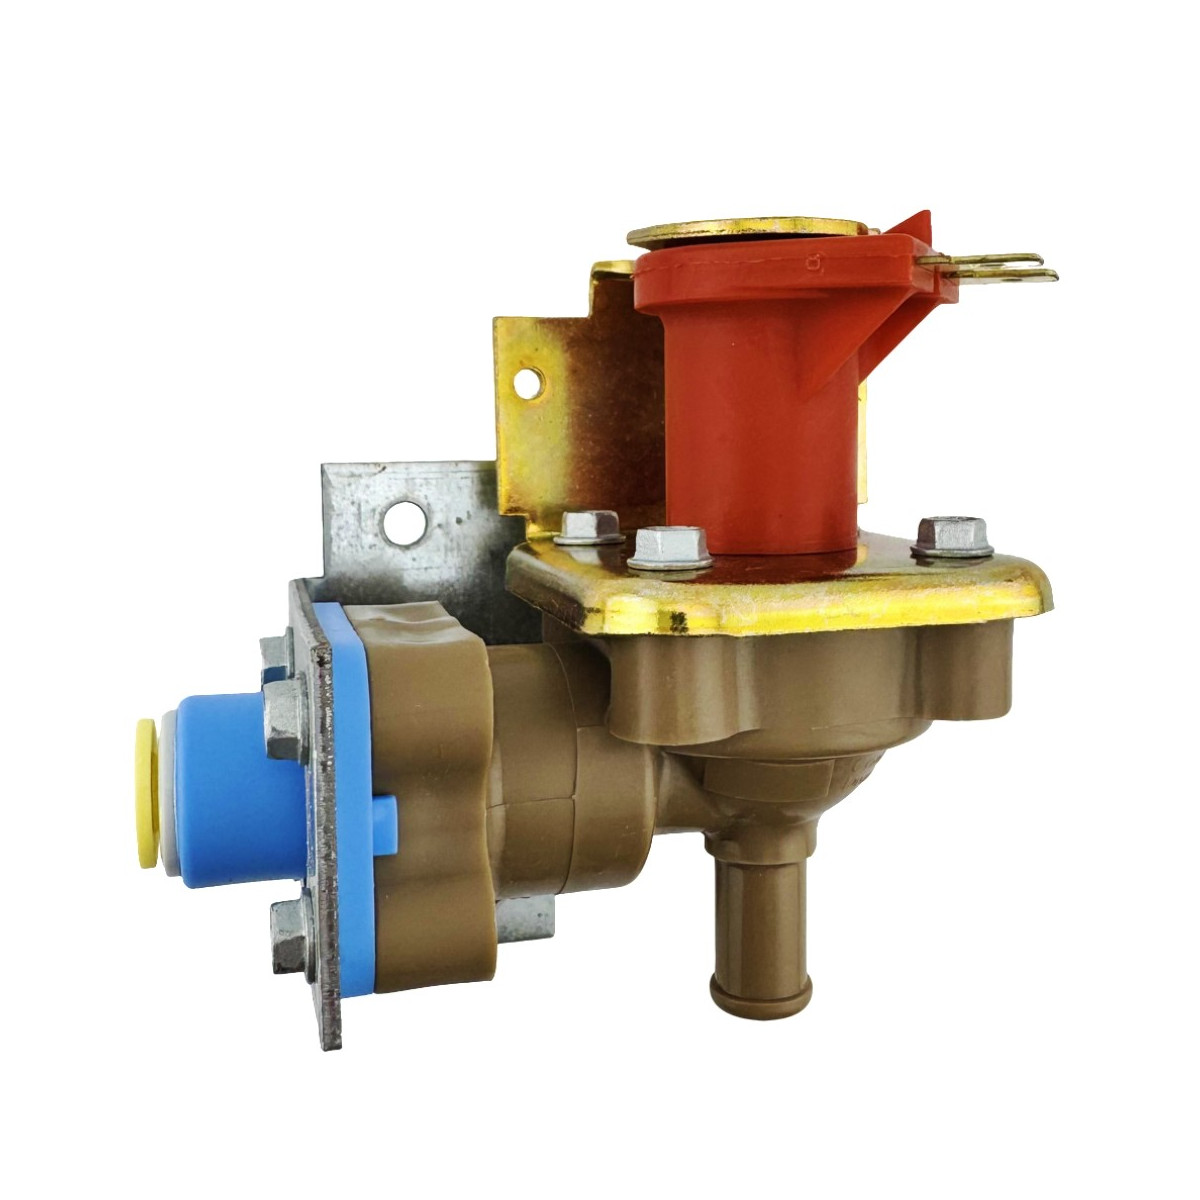
Most people blame the ice maker itself. They buy a whole new assembly for $150 when the real issue is a $30 valve sitting near the floor. These valves operate on a simple electromagnetic principle: the fridge sends a few seconds of electricity to a coil, the coil pulls a plunger, and water screams through the line.
Sediment is the silent killer here. If you live in a city like Phoenix or Indianapolis where the "hard water" is basically liquid rock, calcium deposits build up inside the valve seat. It doesn't take much. A tiny grain of sand or a flake of pipe scale can prevent the valve from seating perfectly. When that happens, you get the "slow drip." That drip freezes inside the fill tube, creates an ice plug, and suddenly, no more ice. You're hacking away at the back of the freezer with a hairdryer at 10:00 PM on a Tuesday. We've all been there.
There’s also the issue of pressure. These valves are rated for a specific range—usually between 20 and 120 psi. If your home's pressure is too low, the valve might not snap shut properly after the fill cycle. It needs that backpressure to help the spring seat the plunger. Without it, you get a "leaky" valve that results in one giant, monolithic block of ice in your bin instead of individual cubes.
The Warning Signs You’re Ignoring
Pay attention to the sound. You know that distinct thunk and the subsequent hiss of water? If that hiss sounds strained or if the thunk is followed by a vibrating hum, your solenoid is struggling. It’s dying.
- Small or hollow cubes: This usually means the valve is partially restricted by sediment.
- The "Double Drop": If you see ice cubes fused together, the valve is weeping. It’s letting water through when it should be bone dry.
- A sudden drop in water pressure at the door: Since many modern refrigerators use a dual-primary valve system, a failure in one side of the ice maker water valve can sometimes throttle the flow to your water dispenser too.
How to Tell if it’s the Valve or the Filter
Before you go tearing the back off your Samsung or Whirlpool, check the filter. Seriously. I've seen countless people replace valves only to realize their water filter was six months overdue and completely choked out. A clogged filter mimics a failing valve perfectly.
Try this: Bypass the filter. Most modern fridges come with a "bypass plug." If the water flow returns to normal and the ice maker fills up quickly, your valve is fine. You just need to stop ignoring that red "change filter" light on your display.
However, if you bypass the filter and the flow is still a pathetic trickle, it’s time to look at the inlet. There’s a tiny mesh screen located right where the house water line screws into the valve. You’d be surprised what ends up in there. Bits of blue plastic from PEX piping, copper shavings, and literal dirt. You can try to clean it with a toothpick, but honestly? Once those screens are gunked, the internal seals are usually toast anyway. Replacing the whole unit is the only way to be sure you won't wake up to a warped hardwood floor.
The DIY Reality Check
Replacing an ice maker water valve is a 2/10 on the difficulty scale. You need a 1/4 inch nut driver, some pliers, and the ability to pull your fridge out without scratching the linoleum.
But here is where people mess up: they don't buy the OEM (Original Equipment Manufacturer) part. It’s tempting to grab the $12 "universal" valve from a random seller online. Don't. These valves are under constant pressure. A cheap knockoff with a weak solenoid or a low-grade rubber seal is a ticking time bomb. If that valve fails in the "open" position while you're at work, you aren't just looking at a broken ice maker—you're looking at a $10,000 insurance claim for water damage. Stick to brands like Supco (which is a reputable aftermarket) or the literal manufacturer part from GE, LG, or Frigidaire.
Step-by-Step Replacement Logic
- Kill the water first. Locate the shut-off valve under the sink or in the basement. If you have one of those "saddle valves" that clamps onto a copper pipe, be careful. Those things are notorious for leaking the moment you touch them.
- Unplug the power. You’re working with water and electricity in the same square inch. Don't skip this.
- Label the wires. Most valves have two or four wires (if it’s a dual valve). They’re usually color-coded, but dust and age can make them look the same.
- The "Push-to-Connect" Trap. Many new fridges use John Guest fittings. You don't unscrew the plastic line; you push the little ring (the collar) in and pull the tube out. If you yank on it without depressing the collar, you’ll score the tubing, and it will never seal again.
- Trim the line. If the end of your plastic water line looks chewed up or flat, snip off a quarter-inch with a sharp utility knife. You want a perfectly square, clean end to pop into the new valve.
What Most People Get Wrong About "Noisy" Valves
Sometimes a loud buzzing isn't the valve dying. It's "water hammer." If your pipes bang against the wall when the ice maker kicks on, that’s kinetic energy with nowhere to go. This vibration can actually shake the internal components of the ice maker water valve until they break.
Installing a small water hammer arrestor—a little vertical tube of air that acts as a shock absorber—can double the life of your valve. It’s a $15 fix that saves you a lot of headache down the road. Especially in newer homes where PEX piping is used, that "thump" can be surprisingly loud and damaging over time.
Also, check your temperature. If your freezer is set too cold (below -5 degrees Fahrenheit), the water can actually freeze inside the valve's outlet port before it even gets to the tray. This creates backpressure that makes the valve hum like it's failing when it's actually just fighting an ice blockage of its own making.
Specific Brand Nuances
LG and Samsung often use multi-way valves that look like a small spaceship. These handle the door water, the ice maker, and sometimes a secondary "Craft Ice" maker. If one part of this complex valve fails, you usually have to replace the whole manifold. It's more expensive, but it's a "one and done" repair.
Whirlpool and Maytag (the FSP parts) tend to use modular valves. These are great because they are easy to find at any local appliance parts warehouse. They’ve used essentially the same design for twenty years because it works. If it ain't broke, don't fix it—until the solenoid burns out, of course.
Critical Maintenance Steps
You can't really "service" a valve, but you can protect it. If you have an older home with galvanized steel pipes, you are going to be replacing your ice maker water valve every few years unless you install a pre-filter. Those old pipes flake off rust internally. That rust travels straight to the fridge.
A simple, in-line sediment filter installed on the back of the fridge can catch the "big stuff" before it reaches the delicate solenoid. It’s a "pre-game" defense.
Actionable Next Steps to Take Right Now:
- Pull the fridge out. Vacuum the coils while you're back there, but specifically look at the water line. Is it braided stainless steel or that thin, brittle white plastic? If it's the plastic stuff, replace it with a braided line immediately. Those plastic lines get brittle with heat and age and are a leading cause of kitchen floods.
- Test the flow. Disconnect the line from the fridge and run it into a bucket. If the stream is weak, your problem is your home plumbing or the shut-off valve, not the fridge.
- Check for "weeping." Look inside your ice bin. Are the cubes stuck together in a big clump at the bottom? If yes, your valve is likely leaking slowly. Replace it now before it gets worse.
- Find your model number. It’s usually on a sticker just inside the refrigerator door frame. Take a photo of it. When you search for a replacement valve, use that exact model number. "Samsung Ice Maker Valve" will give you fifty results; "DA62-04474A" will give you the exact one you need.
There is no "repaired" water valve. There is only "working" and "broken." Because these parts are mostly sealed plastic, trying to take them apart usually results in a leak. If you suspect the valve is the issue, and you've ruled out the filter and the house pressure, just swap it. It’s the cheapest insurance policy you can buy for your kitchen.